How do I setup CI/CD & hosting?
How do I setup CI/CD & hosting?
By Dave Bitter
5 min read
How to build a component library Part 4: Setting up CI/CD & hosting.

- Authors

- Name
- Dave Bitter
Part of series
Now that we have our complete setup for our component library, let’s have a look at how we can automate the linting, testing, formatting and publishing of the packages to the private package registry. Next to that, we can host our Storybook for the world to visit.
How do I use GitHub actions to lint pull requests?
Where you configure your CI/CD is up to where you host your repository or even in a tool like Jenkins. As we are using GitHub for the demo repository and private package registry, it only makes sense to add our CI/CD here as well. To do this, we are going to make use of GitHub Actions. If you are new to GitHub actions, watch my Friday Tip on how to update your GitHub README with GitHub actions.
At its core, GitHub actions allow you to compose a YAML file that consists of various actions and steps. I’ve added a file called pull-request.yml in .github/workflows that looks like this:
name: Pull Request
on:
  push:
  pull_request:
jobs:
  pull-request:
    runs-on: ubuntu-18.04
    steps:
      - name: Checkout code
        uses: actions/checkout@v2
      - name: Use Node.js 16.x
        uses: actions/setup-node@v1
        with:
          node-version: 16.x
      - name: Install dependencies
        uses: borales/actions-yarn@v3.0.0
        with:
          cmd: install
      - name: Lint packages
        uses: borales/actions-yarn@v3.0.0
        with:
          cmd: lint
      - name: Format packages check
        uses: borales/actions-yarn@v3.0.0
        with:
          cmd: format:check
      - name: Check package.json files
        uses: borales/actions-yarn@v3.0.0
        with:
          cmd: manypkg:check
      - name: Run unit tests
        uses: borales/actions-yarn@v3.0.0
        with:
          cmd: test
First, give your workflow a sensible name. In this case, as you are going to create a workflow that will run on every pull request, you call it that. Next, you say that on push or pull-request you want a job to run. Finally, you specify the steps for this job. Here you can checkout the code, install the dependencies and run the linting tasks.
Now if you make a pull request and push it to the demo repository, it will run these steps:
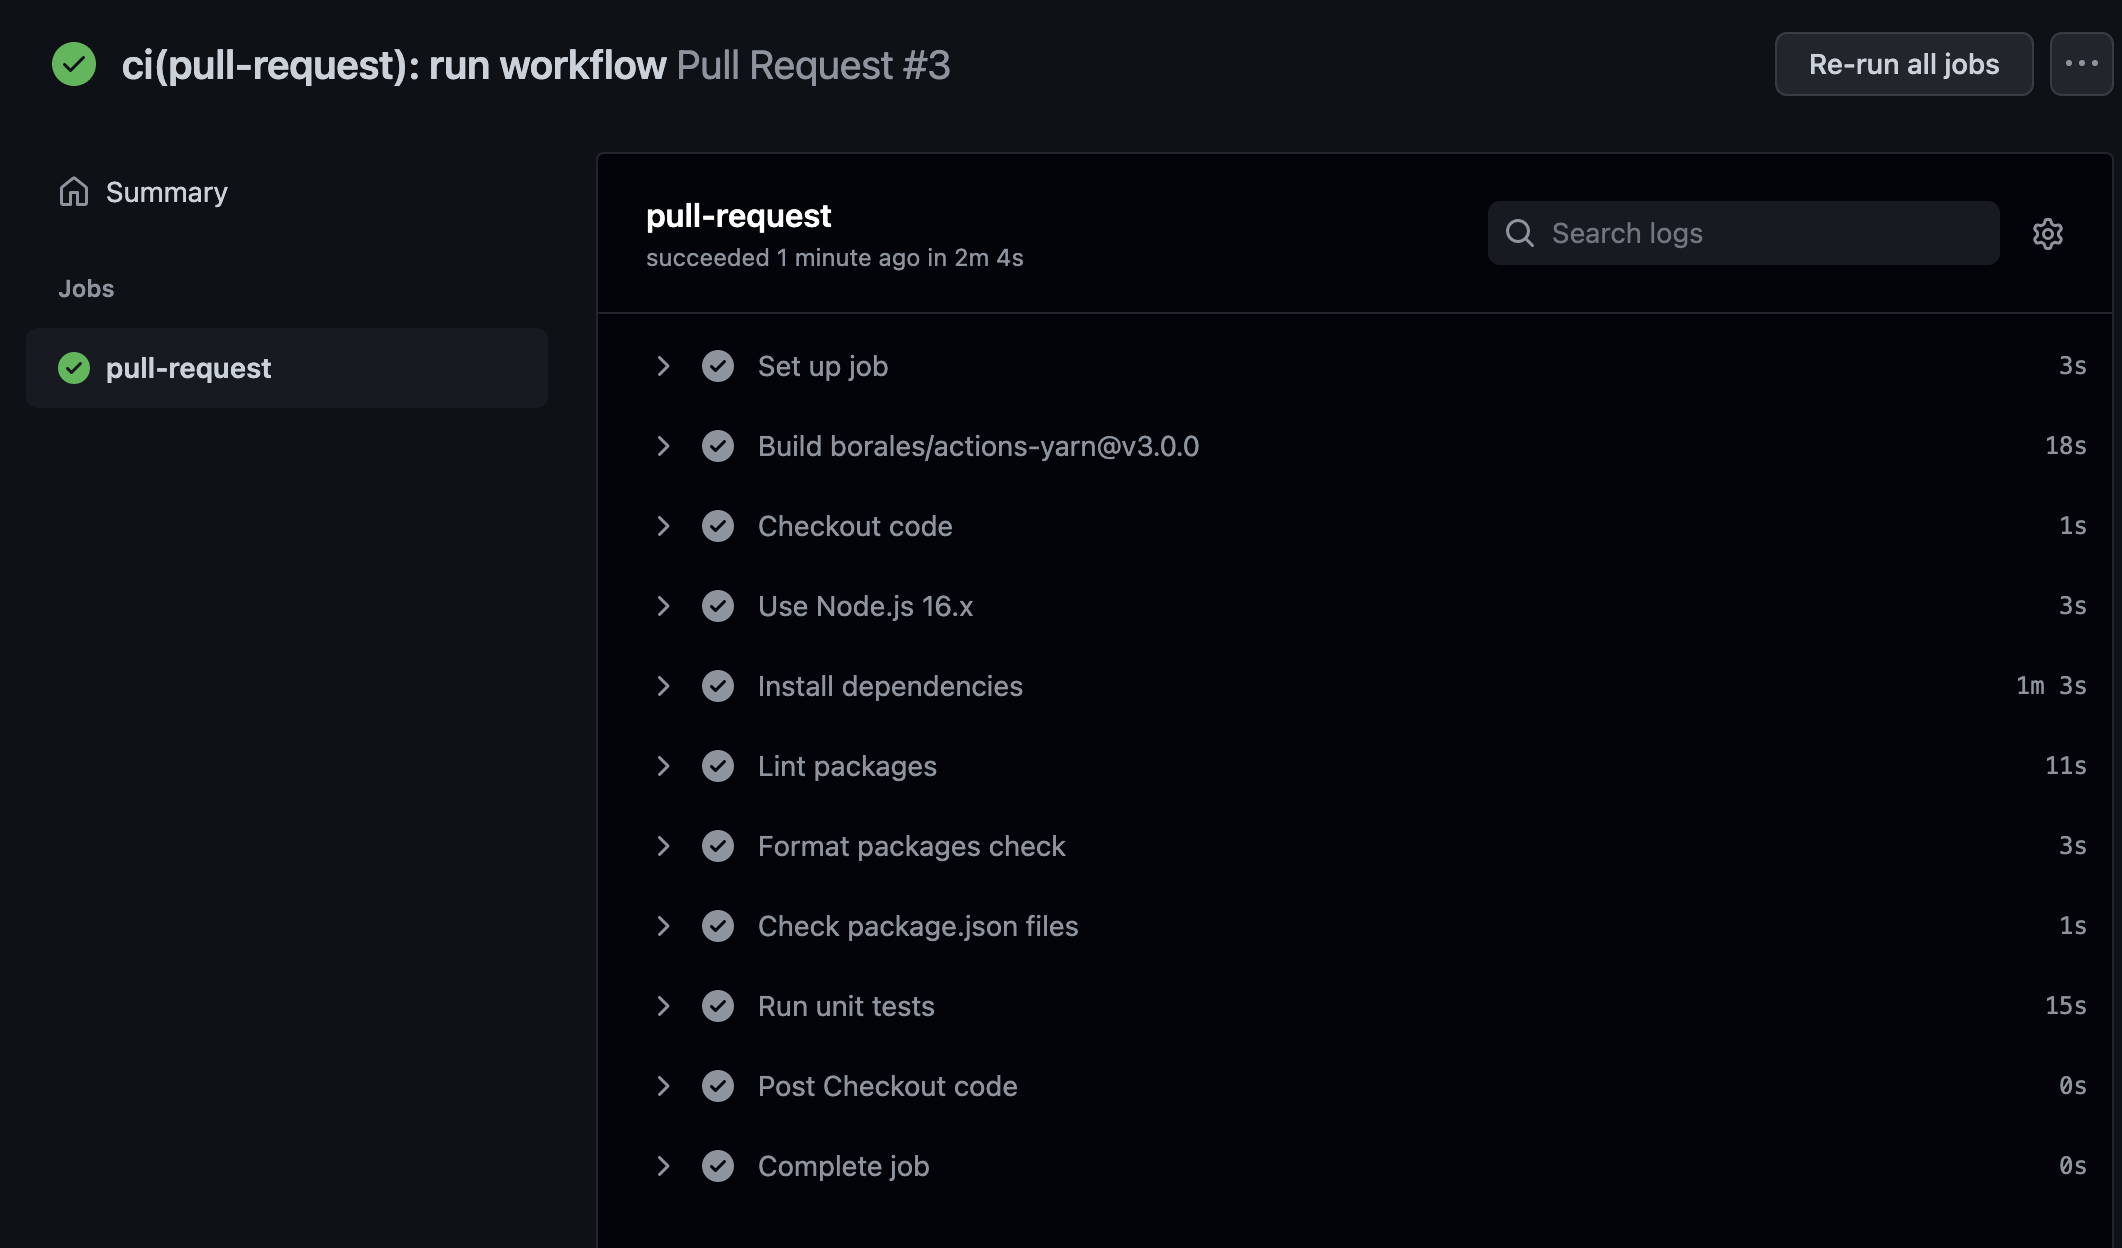
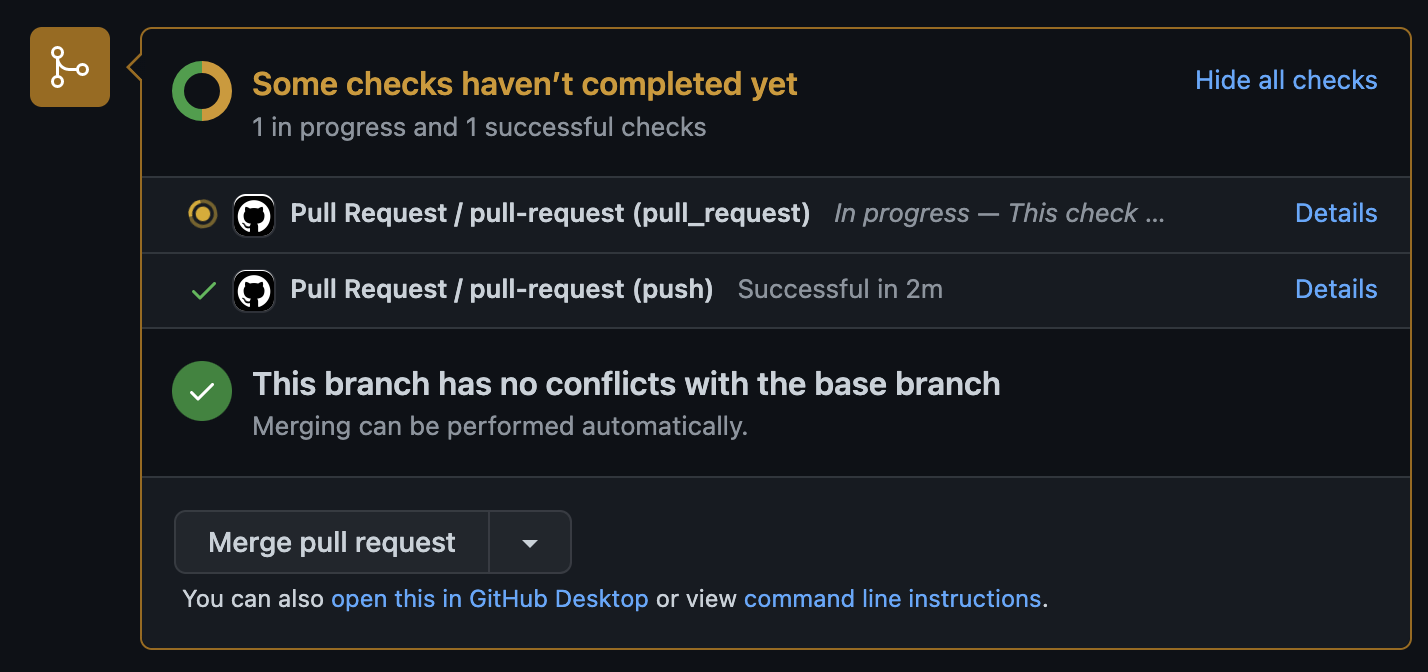
In the pull request overview, you can see the action being executed as well as a mandatory step before you can merge:
How do I publish to a private package registry?
Naturally, you want to add another workflow once the pull request is merged to the master branch that actually deploys the packages to the private package registry and hosts your Storybook. Let’s add another file in .github/workflows that’s called master-deploy.yml. First, you give it a sensible name and specify that we just want the workflow to run on a push to the master branch and run the same linting tasks as for a pull request:
name: Master Deploy
on:
  push:
    branches:
      - master
jobs:
  master-deploy:
    runs-on: ubuntu-18.04
    steps:
      - name: Checkout code
        uses: actions/checkout@v2
      - name: Use Node.js 16.x
        uses: actions/setup-node@v1
        with:
          node-version: 16.x
      - name: Install dependencies
        uses: borales/actions-yarn@v3.0.0
        with:
          cmd: install
      - name: Lint packages
        uses: borales/actions-yarn@v3.0.0
        with:
          cmd: lint
      - name: Format packages
        uses: borales/actions-yarn@v3.0.0
        with:
          cmd: format
      - name: Check package.json files
        uses: borales/actions-yarn@v3.0.0
        with:
          cmd: manypkg:fix
      - name: Run unit tests
        uses: borales/actions-yarn@v3.0.0
        with:
          cmd: test
      ...
Consuming Changesets
Next, You want to consume any Changesets in the .changeset folder:
      ...
      - name: Version changeset
        uses: borales/actions-yarn@v3.0.0
        with:
          cmd: changeset:version
      ...
This will update the versions specified in each package’s package.json to the correct new one. You are now ready to start publishing these changes to the private registry
Authenticating
First, you need to authenticate. As you learned in the first article while setting up the private package registry, you need an npmrc file. Naturally, you don’t want to have the actual contents with the token to be commited to your repository. First, add the token you used in the first article as a secret for the repository. Go to the repository settings and navigate to “secrets” and then “actions”. Here you can add a new secret. Add a secret called ACCESS_TOKEN and use the token from the first article.
Next, you can add a step to create a temporary .npmrc file that uses that token:
      ...
      - name: Authenticate with private NPM package
        run: |
          echo @davebitter:registry=https://npm.pkg.github.com/davebitter >> ./.npmrc
          echo //npm.pkg.github.com/:_authToken=${ACCESS_TOKEN} >> ./.npmrc
          echo registry=https://registry.npmjs.org >> ./.npmrc
        env:
          ACCESS_TOKEN: ${{ secrets.ACCESS_TOKEN }}
       ...
Publishing to the private package registry
Now you can finally publish the updated packages:
      ...
      - name: Publish changeset
        uses: borales/actions-yarn@v3.0.0
        with:
          cmd: changeset:publish
      ...
How do I host Storybook?
Naturally, you want to deploy your updated Storybook build as well. There are many different services you can use for this. For the demo repository, I will host the build on Netlify. Remember, it’s all opinionated.
Netlify
First, create an account and a new site on Netlify. There are great guides on how to do this. You can let Netlify connect to your GitHub and automatically configure pipelines, but where’s the fun in that? Let’s manually deploy to Netlify. First, you create a new build of your Storybook:
      ...
      - name: Create build
        uses: borales/actions-yarn@v3.0.0
        with:
          cmd: build
      ...
Next, use nwtgck/actions-netlify@v1.2 to publish the build:
      ...
      - name: Deploy to Netlify
        uses: nwtgck/actions-netlify@v1.2
        with:
          publish-dir: './dist'
          production-branch: master
          github-token: ${{ secrets.GITHUB_TOKEN }}
          deploy-message: 'Deploy from GitHub Actions'
          enable-pull-request-comment: false
          enable-commit-comment: true
          overwrites-pull-request-comment: true
        env:
          NETLIFY_AUTH_TOKEN: ${{ secrets.NETLIFY_AUTH_TOKEN }}
          NETLIFY_SITE_ID: ${{ secrets.NETLIFY_SITE_ID }}
        timeout-minutes: 1
      ...
Finally, you tell the action where to find the build and under env you pass the NETLIFY_SIDE_ID of your newly created site on Netlify and pass it the NETLIFY_AUTH_TOKEN . You can find more information on how to create that token here. Naturally, you add the tokens as secrets in your repository just like the ACCESS_TOKEN to publish to the private package registry.
Committing any updated files
During the linting process, there might have been changes made to comply with the configurations set. Next to that, the Changeset files are consumed and need to be removed from the repository. For this, you need to commit at the end of the workflow. Luckily, this is rather easy using the stefanzweifel/git-auto-commit-action@v4 action:
      ...
      - name: Create commit
        uses: stefanzweifel/git-auto-commit-action@v4
        with:
          file_pattern: packages .changeset
          commit_message: 'chore(ci): commit updated files in workflow'
          commit_options: '--no-verify --signoff'
          branch: master
As you can see, any changes in the package or .changeset folder are commited with a custom commit message.
Putting it all together
Once all these parts are put together, you end up with a workflow that looks a bit like this:
name: Master Deploy
on:
  push:
    branches:
      - master
jobs:
  master-deploy:
    runs-on: ubuntu-18.04
    steps:
      - name: Checkout code
        uses: actions/checkout@v2
      - name: Use Node.js 16.x
        uses: actions/setup-node@v1
        with:
          node-version: 16.x
      - name: Install dependencies
        uses: borales/actions-yarn@v3.0.0
        with:
          cmd: install
      - name: Lint packages
        uses: borales/actions-yarn@v3.0.0
        with:
          cmd: lint
      - name: Format packages
        uses: borales/actions-yarn@v3.0.0
        with:
          cmd: format:fix
      - name: Check package.json files
        uses: borales/actions-yarn@v3.0.0
        with:
          cmd: manypkg:fix
      - name: Run unit tests
        uses: borales/actions-yarn@v3.0.0
        with:
          cmd: test
      - name: Version changeset
        uses: borales/actions-yarn@v3.0.0
        with:
          cmd: changeset:version
      - name: Authenticate with private NPM package
        run: |
          echo @davebitter:registry=https://npm.pkg.github.com/davebitter >> ./.npmrc
          echo //npm.pkg.github.com/:_authToken=${ACCESS_TOKEN} >> ./.npmrc
          echo registry=https://registry.npmjs.org >> ./.npmrc
        env:
          ACCESS_TOKEN: ${{ secrets.ACCESS_TOKEN }}
      - name: Publish changeset
        uses: borales/actions-yarn@v3.0.0
        with:
          cmd: changeset:publish
      - name: Create build
        uses: borales/actions-yarn@v3.0.0
        with:
          cmd: build
      - name: Deploy to Netlify
        uses: nwtgck/actions-netlify@v1.2
        with:
          publish-dir: './dist'
          production-branch: master
          github-token: ${{ secrets.GITHUB_TOKEN }}
          deploy-message: 'Deploy from GitHub Actions'
          enable-pull-request-comment: false
          enable-commit-comment: true
          overwrites-pull-request-comment: true
        env:
          NETLIFY_AUTH_TOKEN: ${{ secrets.NETLIFY_AUTH_TOKEN }}
          NETLIFY_SITE_ID: ${{ secrets.NETLIFY_SITE_ID }}
        timeout-minutes: 1
      - name: Create commit
        uses: stefanzweifel/git-auto-commit-action@v4
        with:
          file_pattern: packages .changeset
          commit_message: 'chore(ci): commit updated files in workflow'
          commit_options: '--no-verify --signoff'
          branch: master
Now, for every pull request there is automated linting and testing. After all checks have passed and the pull request is merged, the CI/CD publishes all updated packages and the updated Storybook.
Looking back
This was the final step for setting up a component library from start to finish. Naturally, there are many more requirements you might run into. A component library is a never-ending living organism. Hopefully, you’ve learned a bit more about how you can approach requirements and create an awesome component library! Thanks for following along and good luck with your own!