Frontend Automation with Github Actions and AWS
Frontend Automation with Github Actions and AWS
By Sagar Sawuck
7 min read
No matter which tech stack you use, automating your deployment process can save you time and headaches. Let's see how to use Github Actions to automate your frontend deployments to AWS S3.
- Authors

- Name
- Sagar Sawuck
Table of Contents
- TL;DR The problem: Automating AWS deployments
- The solution: Using GHA
- Introducing GHA
- The Original Problem definition
- How to use the AWS CLI and Github secrets
- The Final Piece of The Puzzle
- Show me the code!
- Final Thoughts
TL;DR The problem: Automating AWS deployments
I recently updated my developer website after almost 3 years! Following an epic battle with the usual node module dependencies update (the struggle is real :D), I ran into another issue: deployment.
For some context, the website is a static website hosted on AWS S3, with CloudFront caching. This is a popular choice for frontend hosting. However, it is quite a hassle to deploy manually:
- Build locally the project
- Login to AWS
- Go to S3, delete the contents of the bucket
- Upload the new build files in the bucket
- Go to CloudFront, invalidate the cache
- Test live ⇒ bug ? Fix and go back to 1 : done!
After using Github Actions (GHAs) in my previous job to automate testing on pull requests, I wanted to automate the deployment of my website when new changes are pushed to the master branch.
The solution: Using GHA
Introducing GHA
TL;DR: If you are new to GHAs, it basically allows you to run specific workflows (a set of jobs or actions) on predefined events like pushing to a branch or opening pull requests directly in a Github repository.
GitHub Actions is a continuous integration and continuous delivery (CI/CD) platform that allows you to automate your build, test, and deployment pipeline. You can create workflows that build and test every pull request to your repository, or deploy merged pull requests to production.
The main components of GHAs:
- Workflows - set of automated jobs you want to execute on specific events
- Events - triggers that run workflows, e.g opening a pull request
- Actions - set of predefined and reusable workflows, e.g setup node to install deps
- Runners - on-demand servers that execute workflows when events are triggered
Example: When a PR is opened, we want to run unit tests.
on: # <-- event
  pull_request:
    types: [opened]

jobs: # <--- workflow
  build-and-test:
    runs-on: ubuntu-latest # <-- runner

    steps: # <-- workflow breakdown
      - name: Checkout code
        uses: actions/checkout@v3 # <-- action

      - name: Set up Node.js
        uses: actions/setup-node@v3 # <-- action

      - name: Install dependencies
        run: npm install # <-- job

      - name: Build project
        run: npm run build # <-- job

      - name: Run tests
        run: npm run test # <-- job
This workflow runs whenever a pull request is made. It runs on ubuntu-latest. It uses a predefined action actions/checkout@v3 to checkout the code, then another action to setup the specified node version, followed by the defined jobs: installing dependencies npm install, building the project npm run build and running the tests npm run test. The NPM commands are as defined in the project’s package.json.
You can dive deeper into GHAs on the official Github documentation here.
The Original Problem definition
Getting back to the original problem, we want to build the app and then deploy to AWS S3 when a push is made to the master branch.
By now, the first part of the task should be quite simple. Similar to the example above, we want to checkout the code, setup a specific version of NodeJs compatible with the project, install dependencies, and finally build the project - but it uses a different event.
on:
  push:
    branches:
      - master

jobs:
  build-and-deploy:
    runs-on: ubuntu-latest

    steps:
      - name: Checkout code
        uses: actions/checkout@v3

      - name: Set up Node.js
        uses: actions/setup-node@v3
        with:
          node-version: '20' # Specify the Node.js version

      - name: Install dependencies
        run: npm ci

      - name: Build project
        run: npm run build
The next step is about how to deploy to AWS.
How to use the AWS CLI and Github secrets
AWS provides a CLI tool that can be used to programmatically manage AWS resources like S3 or CloudFront. Although not necessary, I recommend setting it up locally to test the commands before trying it out on an actual hosted website.
You can follow the AWS documentation for how to install and configure it.
This is precisely what we need to do in our Github workflow. Luckily, there is an official action available from AWS to do just that: aws-actions/configure-aws-credentials@v2. For this action to work though, an IAM (Identity and Access Management) user needs to created on AWS with the required permissions to authorise the action to communicate with our AWS resources.
Let’s briefly walk-through the steps needed (assuming AWS root user or sufficient admin privileges):
- Sign in to the AWS Management Console:
- Go to https://console.aws.amazon.com/
- Sign in with your AWS account
- Navigate to IAM:
- In the AWS services search bar, type "IAM" and select it from the dropdown
- Create a new IAM user:
- In the left sidebar, click on "Users"
- Click the "Add users" button
- Choose a username (e.g., "github-actions-deployer")
- For "Select AWS credential type", choose "Access key - Programmatic access"
- Click "Next: Permissions"
- Set permissions:
- Click "Attach existing policies directly"
- Search for and select the policies needed for your deployment. Common ones include:
AmazonS3FullAccess(for S3 deployments)CloudFrontFullAccess(if using CloudFront)
- Alternatively, you can create a custom policy with more restricted permissions
- Click "Next: Tags"
- Add tags (optional):
- You can add key-value pair tags for better organisation
- Click "Next: Review"
- Review and create:
- Review the user details and permissions
- Click "Create user"
- Secure the credentials:
- On the success page, you'll see the Access Key ID and Secret Access Key
- Download the .csv file or copy these credentials immediately
- Important: This is the only time you'll see the Secret Access Key, so make sure to save it securely
Next up, we need to configure the Github secrets with the AWS access key.
Secrets are variables that you create in an organization, repository, or repository environment. The secrets that you create are available to use in GitHub Actions workflows. GitHub Actions can only read a secret if you explicitly include the secret in a workflow.
Set up GitHub Secrets:
- Go to your GitHub repository
- Click on
Settings > Secrets > New repository secret - Add two secrets:
- Name:
AWS_ACCESS_KEY_ID, Value:[Your Access Key ID] - Name:
AWS_SECRET_ACCESS_KEY, Value:[Your Secret Access Key]
- Name:
Use in GitHub Actions:
In the Github workflow, the AWS action can now be use these secrets like this:
- name: Configure AWS credentials
  uses: aws-actions/configure-aws-credentials@v2
  with:
    aws-access-key-id: ${{ secrets.AWS_ACCESS_KEY_ID }}
    aws-secret-access-key: ${{ secrets.AWS_SECRET_ACCESS_KEY }}
    aws-region: us-east-1 # Replace with your AWS region
Important Security Considerations:
- Never share your AWS credentials or commit them to your repository.
- Use the principle of least privilege: only grant the permissions necessary for deployment.
- Regularly rotate your access keys.
- For production environments, consider implementing additional security measures like IP restrictions or multi-factor authentication.
By following these steps, you'll create AWS credentials that can be securely used in your GitHub Actions workflow for deployment. Remember to keep your credentials secure and never expose them in your code or public repositories.
The Final Piece of The Puzzle
Now all that’s left is to synchronise the build files to our S3 bucket and optionally invalidate the CloudFront cache. These commands are available from the AWS CLI tool:
  - name: Deploy to S3
      run: |
        aws s3 sync build/ s3://your-bucket-name --delete
        # Optional: Invalidate CloudFront distribution
        aws cloudfront create-invalidation --distribution-id YOUR_DISTRIBUTION_ID --paths "/*"
Important notes:
aws s3 sync: This is the base command that tells AWS CLI to synchronise files with an S3 bucket.- The
build/directory is assumed to be where your Node.js build output goes. Adjust this if your project uses a different output directory. s3://your-bucket-name: This is the destination - the S3 bucket where you want to sync your files. Replaceyour-bucket-namewith the actual name of your S3 bucket.--delete: This option tells the sync command to delete files from the destination (S3 bucket) that no longer exist in the source (local build directory). This ensures that your S3 bucket exactly matches your local build output.- If you're using CloudFront, replace
YOUR_DISTRIBUTION_IDwith your actual CloudFront distribution ID. - Make sure your S3 bucket is configured for static website hosting if you're deploying a website.
- Ensure the AWS IAM user associated with the credentials has the necessary permissions to write to the S3 bucket and create CloudFront invalidations (if used).
Et voilà !
Show me the code!
Putting everything together, as convention would have it, a YAML file should be created in your repository as follows: .github/workflows/{{name-of-your-workflow}}.yml
name: Build and Deploy to S3

on:
  push:
    branches:
      - master

jobs:
  build-and-deploy:
    runs-on: ubuntu-latest

    steps:
      - name: Checkout code
        uses: actions/checkout@v3

      - name: Set up Node.js
        uses: actions/setup-node@v3
        with:
          node-version: '16'

      - name: Install dependencies
        run: npm ci

      - name: Build project
        run: npm run build

      - name: Configure AWS credentials
        uses: aws-actions/configure-aws-credentials@v2
        with:
          aws-access-key-id: ${{ secrets.AWS_ACCESS_KEY_ID }}
          aws-secret-access-key: ${{ secrets.AWS_SECRET_ACCESS_KEY }}
          aws-region: us-east-1

      - name: Deploy to S3
        run: |
          aws s3 sync build/ s3://${{ secrets.AWS_BUCKET_NAME }} --delete
          # Invalidate CloudFront distribution
          aws cloudfront create-invalidation --distribution-id ${{ secrets.AWS_CLOUDFRONT_ID }} --paths "/*"
You can find an example on my Github here.
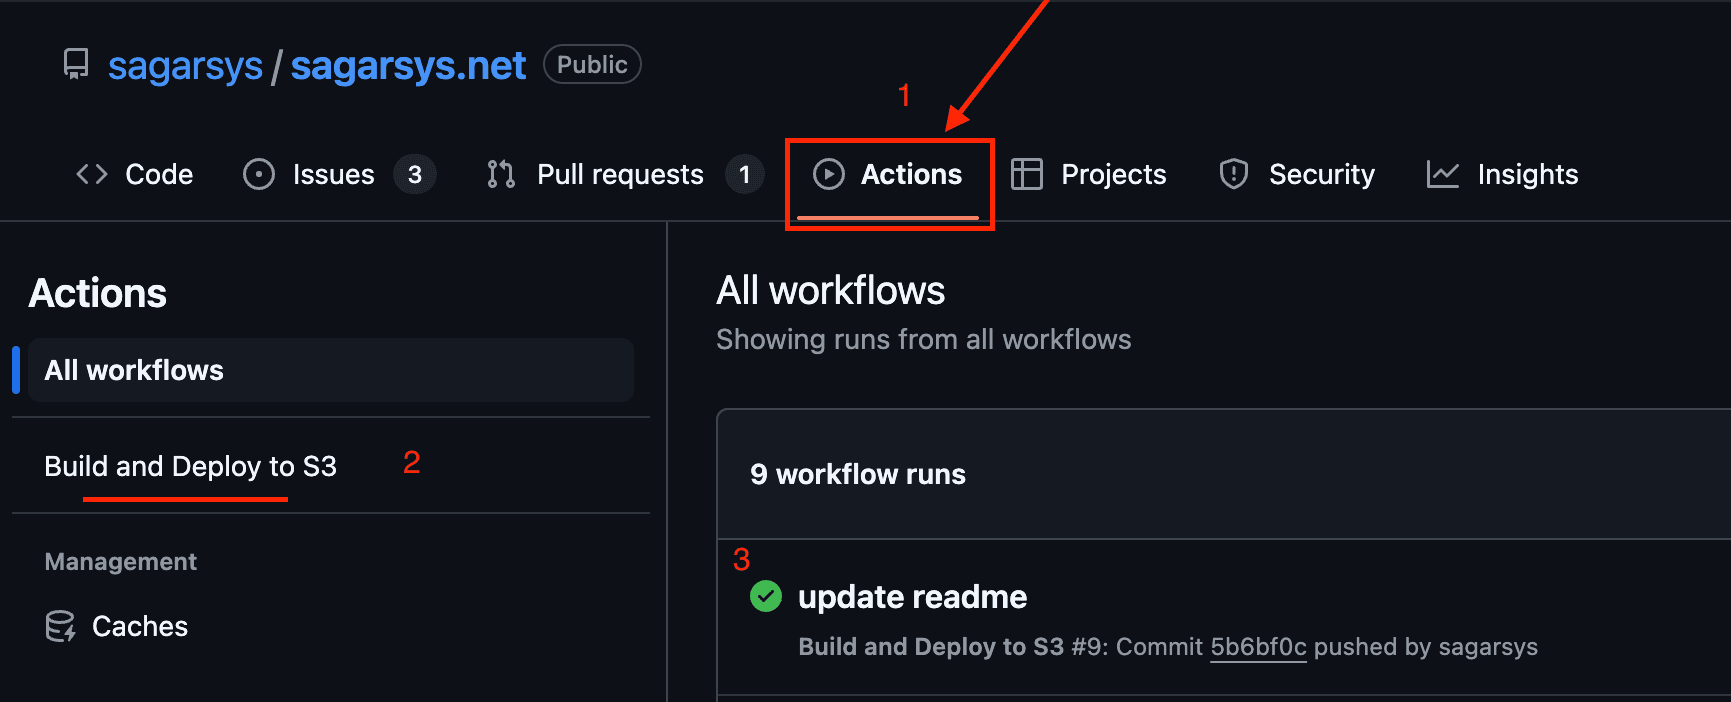
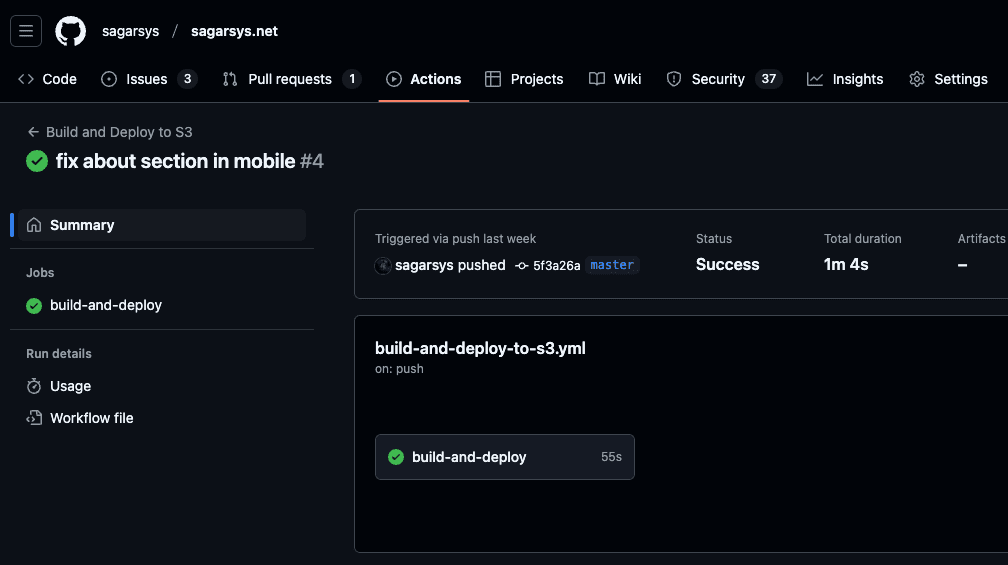
- You can now monitor your deployments directly in your Github repo!
- The name in the YAML file is used to identify a specific action, in our case “build and deploy to S3”.
- You can click on the commit message for more details about a run.
Final Thoughts
Deploying my website now takes about a minute after pushing changes to the master branch! Although there is a slight learning curve, automating workflows with GHAs saves a lot of time once you get used to it and is definitely worth exploring!
As the lines between software development and DevOps become increasingly blurred, GHAs become crucial. They automate repetitive tasks like testing, building, and deploying, allowing more focus on the application's core instead of infrastructure.